1. SUNDB GUI TOOL
1.1. 개요
GUI SQL TOOL을 SUNDB와 연결하여 사용하기 위해 Execute Query라는 제품을 사용합니다. Execute Query는 http://www.executequery.org 에서 다운로드 합니다.

1.2. Introducing Execute Query
Execute Query is an operating system independent database utility written entirely in Java.
Using the flexibility provided by Java Database Connectivity (JDBC), Execute Query provides a simple way to interact with almost any database from simple queries to table creation and import/export of an entire schema's data. See Features for a list of some of the available tools.
This software was developed using IntelliJ IDEA who kindly provide Execute Query developers with free licenses, and Eclipse Java IDEs and jEdit on a Debian GNU/Linux system.
Execute Query has been tested under Windows, Linux, Solaris and Mac using Java Runtime Environment v1.6 - Java v1.6.0 (min) is recommended. If you do not have the required Java version please go to the Java website.
Execute Query is very much a work in progress and is continually being extended and refined with new features and tools. Interests of contribution are welcome.
Execute Query is available completely free of charge and will remain so under the GNU Public License.
<출처 : http://www.executequery.org/>
2. Execute Query 설치
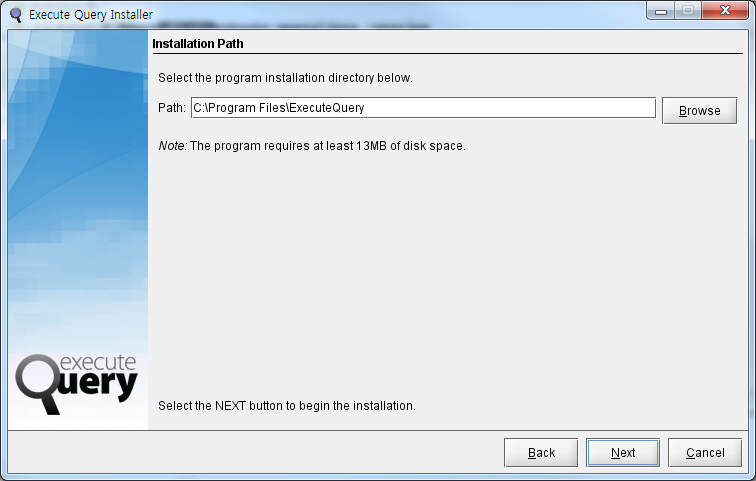
2.1. 설치파일의 실행
Execute Query는 Java 기반의 프로그램으로 Java Runtime이 설치되어 있어야 합니다. 다운로드가 완료된 후 아래와 같이 설치 파일을 실행 합니다.
$> java –jar executequery-installer-v4.1.1.jar


2.2. Execute Query 실행
Execute Query 아이콘을 클릭하여 프로그램을 실행 합니다.

2.3. SUNDB 연결 설정
2.3.1. JDBC Driver 설정
좌측의 Driver Tab에서 “New JDBC Driver”를 선택합니다.

Driver Name에 “SUNDB” 라고 입력하고, Database는 “Other”를 선택 합니다.

JDBC URL은 “jdbc:sundb://127.0.0.1:22581/test”의 형식으로 입력하고, Class Name은 “sunje.sundb.jdbc.SundbDriver”를 입력 합니다.

“Add Library” 버튼을 클릭하여 SUNDB 설치시 제공되는 SUNDB용 JDBC드라이버를 선택 합니다.

※ JDBC Driver 는 SUNDB가 설치된 디렉토리에서 다운로드 받아 사용합니다.
[sunje@symphony ~]$ cd $SUNDB_HOME/lib
[sunje@symphony ~]$
[sunje@symphony lib]$ ls -la
합계 54036
drwxrwxr-x. 2 sunje sunje 4096 2015-03-05 20:28 .
drwxrwxr-x. 9 sunje sunje 4096 2015-03-05 20:28 ..
-rw-r--r--. 1 sunje sunje 14 2015-03-05 19:12 README
-rwxr-xr-x. 1 sunje sunje 20498 2015-03-05 19:52 libstib.so
-rw-r--r--. 1 sunje sunje 13187242 2015-03-05 20:16 libsundb.a
-rw-r--r--. 1 sunje sunje 13096278 2015-03-05 20:16 libsundba.a
lrwxrwxrwx. 1 sunje sunje 25 2015-03-05 20:28 libsundbas.so -> libsundbas.so.Trunk.2.2.0
-rwxr-xr-x. 1 sunje sunje 8642314 2015-03-05 20:17 libsundbas.so.Trunk.2.2.0
-rw-r--r--. 1 sunje sunje 4497506 2015-03-05 20:16 libsundbc.a
lrwxrwxrwx. 1 sunje sunje 30 2015-03-05 20:28 libsundbcs-ul32.so -> libsundbcs-ul32.so.Trunk.2.2.0
-rwxr-xr-x. 1 sunje sunje 3003998 2015-03-05 20:05 libsundbcs-ul32.so.Trunk.2.2.0
lrwxrwxrwx. 1 sunje sunje 30 2015-03-05 20:28 libsundbcs-ul64.so -> libsundbcs-ul64.so.Trunk.2.2.0
-rwxr-xr-x. 1 sunje sunje 3003998 2015-03-05 20:06 libsundbcs-ul64.so.Trunk.2.2.0
-rw-r--r--. 1 sunje sunje 143654 2015-03-05 20:17 libsundbesql.a
lrwxrwxrwx. 1 sunje sunje 28 2015-03-05 20:28 libsundbesqls.so -> libsundbesqls.so.Trunk.2.2.0
-rwxr-xr-x. 1 sunje sunje 90615 2015-03-05 20:12 libsundbesqls.so.Trunk.2.2.0
lrwxrwxrwx. 1 sunje sunje 24 2015-03-05 20:28 libsundbs.so -> libsundbs.so.Trunk.2.2.0
-rwxr-xr-x. 1 sunje sunje 8653042 2015-03-05 20:17 libsundbs.so.Trunk.2.2.0
-rw-r--r--. 1 sunje sunje 312539 2015-03-05 20:13 sundb4.jar
-rw-r--r--. 1 sunje sunje 307075 2015-03-05 20:13 sundb5.jar
-rw-r--r--. 1 sunje sunje 328835 2015-03-05 20:12 sundb6.jar
[sunje@symphony lib]$
|
설정이 완료된후 저장 합니다.

2.3.2. Connection 설정
Connections Tab을 클릭하고 Context Menu에서 “New Connection”을 선택 합니다.

Database Browser 의 Connection 화면의 Connection Name에 “sundb”를 입력합니다.
User Name 부분에 “TEST”를 입력하고, Password 부분에 “test”를 입력합니다.(User Name에 입력하는 기본 계정명칭은 대문자를 사용합니다.)
SUNDB가 설치된 서버의 IP를 설정하고, SUNDB Listener의 포트번호를 설정합니다. (기본 포트번호는 22581을 사용합니다.)
JDBC URL 부분은 “jdbc:sundb://127.0.0.1:22581/test” 형식으로 입력하고, JDBC Driver부분에서는 이전에 설정한 SUNDB를 선택 합니다.
설정 값을 저장한 후 “Connect” 버튼을 클릭하여 접속을 확인 합니다.


3. GUI환경의 SQL사용
Query Editor를 이용하여 SQL을 사용합니다.


4. 접속을 위한 Service Listener 설정
SQL TOOL을 사용하기 위해서는 SUNDB가 설치된 서버에 서비스를 위한 접속서버가 실행되어 있어야 합니다.
4.1. Listener 서비스 시작
[sundb@cheroky ~]$ glsnr --start
|
4.2. Listener 서비스 상태 확인
[sundb@cheroky ~]$ glsnr --status
Listener process ID : 4139
Listener confiuration file : /home/sundb/sundb/sundb_mercury/sundb_data/conf/sundb.listener.conf
Unix Domain Path : /tmp/sundb-unix-22581
TCP Listen Port : 22581
>>> Listener is running <<<
[sundb@cheroky ~]$
|
4.3. Listener 서비스 종료
[sundb@cheroky ~]$ glsnr --stop
[sundb@cheroky ~]$ glsnr --status
>>> Listener is stopped <<<
[sundb@cheroky ~]$
|
5. 접속이 안될경우 SUNDB 설정
SUNDB 에 META Schema가 생성이 안되어 있을경우 SQL TOOL이 접속이 되지 않을수 있습니다.
5.1. Meta Schema 생성
$SUNDB_HOME/admin 디렉토리에 있는 3개의 Schema파일을 Build해 주어야 합니다.
[sunje@symphony lib]$ cd $SUNDB_HOME/admin
[sunje@symphony admin]$ [sunje@symphony admin]$ ls -la 합계 988 drwxrwxr-x. 2 sunje sunje 4096 2015-03-05 20:28 . drwxrwxr-x. 9 sunje sunje 4096 2015-03-05 20:28 .. -rw-r--r--. 1 sunje sunje 756383 2015-03-05 19:12 DictionarySchema.sql -rw-r--r--. 1 sunje sunje 141152 2015-03-05 19:12 InformationSchema.sql -rw-r--r--. 1 sunje sunje 94640 2015-03-05 19:12 PerformanceViewSchema.sql -rw-r--r--. 1 sunje sunje 21 2015-03-05 19:12 README [sunje@symphony admin]$ [sunje@symphony admin]$ gsql --as sysdba --import DictionarySchema.sql ... [sunje@symphony admin]$ gsql --as sysdba --import InformationSchema.sql
...
[sunje@symphony admin]$ gsql --as sysdba --import PerformanceViewSchema.sql
[sunje@symphony admin]$
|